Buying a huge canvas on a whim at a craft store was something I had always wanted to do. So I did it!… and then I had no idea what to paint. Such a large surface was slightly intimidating, though I really needed artwork to go above the couch. And so began the ever enticing, and always addicting, Pinterest filled afternoon. I found this great painting that looked so amazing and it was listed as a DIY, but it turned out to be something you could purchase and there were no instructions for creating it. Booooo!

I promptly decided it was my duty to create one! Here’s my DIY tutorial for Herringbone Brick Patterned Art.
Herringbone Brick Patterned Art DIY
Supplies:
Large canvas (mine was 2′ x 4′)
Large paintbrush
Painter’s tape or masking tape that is 1/4″ wide (I cut 1/2″ tape in half…it wasn’t the smartest choice but I already had it and wanted to use it up!)
Ruler
3-4 acrylic paint colors that go well together
White paint (for the background if you’d like)
1. Paint the canvas white…honestly I felt really dumb painting a white canvas white…but I feel like it makes it a more complete painting in the end. If you don’t paint it then the plain canvas will show through on the final product.
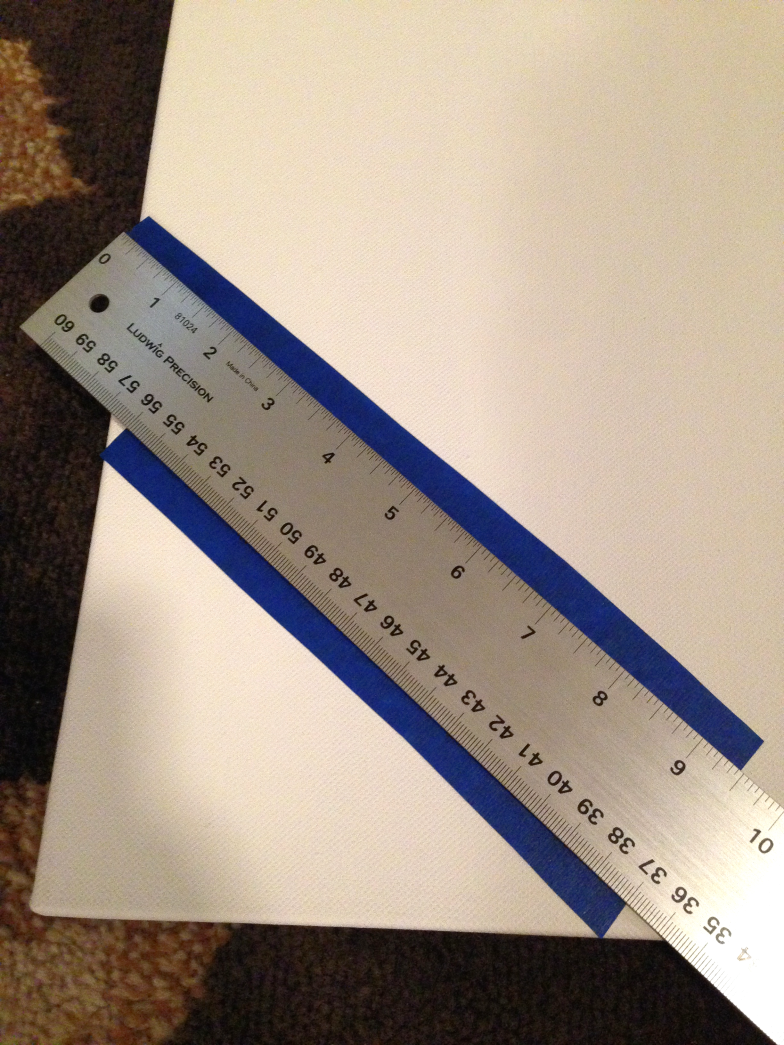
2. Tape the canvas with the herringbone brick pattern. This is easier said than done. I’ve tried to show you the whole process below to make this project more approachable. To get started I measured and taped a small mark 6″ from the edge of the canvas. I then measured out a piece of tape about 7.5″ long and taped it from the 6″ mark at a 45 degree angle to the edge of the canvas. Next, place another strip of tape about 9.5″ long parallel to the first piece with a 1.5″ gap between them. There are a lot of numbers and math-y terms here so let’s look at some pictures, shall we?
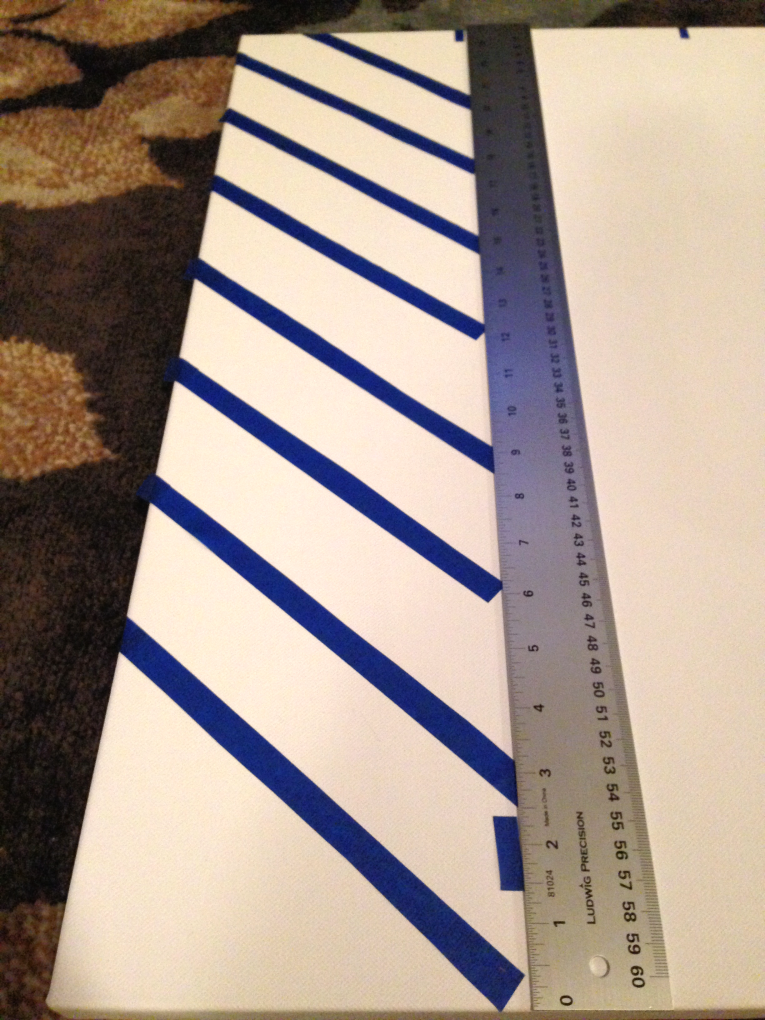
3. Once you have the first two strips of tape, you repeat this same pattern, keeping all of the strips parallel and 1.5″ apart. You can use your ruler to make sure they are all lined up. The left picture below shows the 7.5″ tape strips lined up, and the right shows the 9.5″ strips.
4. Tape the strips perpendicularly to the other strips starting at the top. Start with about a 6″ piece of tape that meets the end of the second strip of tape from step 3. This completes your first brick! Place another small strip to the left of it 1.5″ away to complete the bricks at the top of the canvas. Once you have done this, start adding tape to finish the rest of the bricks going down the row. The bricks end up being 10″ x 1.5″. Keep in mind these measurements are for the white space. When you are taping out the bricks, adjust the lengths by adding and removing bits of tape. The beauty of the tape is that it’s really easy to change, so you can make sure your bricks are even in size.
5. From here you should be good to go! Keep taping out the pattern in the same manner as you did in step 4, snaking the pattern up and down the canvas. Once you get close to the other side of the canvas, finish off by adding however much length is necessary to complete one last row of partial bricks.
6. The last taping step is to tape around the outside of the canvas. This keeps the tape from peeling up and also helps you from painting on the sides of the canvas. Pick a few bricks and cover them with tape as well if you like that look. Now pick your liquid courage because it’s time to start painting crafty bunnies! I chose both wine and tea…I was a little nervous to taint the beauty of the hour of taping I had just completed…
7. Pick a color and channel your inner Van Gogh. Start painting large areas of color with light brushstrokes. Don’t worry about an even coat of paint because the more random it is, the more rustic it will turn out. The only key to painting is to not mix colors while they are wet! I did several layers of painting, the first where none of the colors touched, and then I waited for them to dry before adding more. The project might stretch over a few hours but you don’t want muddy colors! To make the painting more dynamic think about adding a darker color to small areas. It’s a little hard to tell in the photos, but I added dark purple.
8. Once the paint is dry, peel off the tape and you have a work of art! Show it off to all of your friends or pretend you’ve started a high end art collection….maybe they won’t notice the difference…


how did you frame it after?
LikeLiked by 1 person
Here is the tutorial for the frame I made! https://bunnybaubles.com/2016/03/22/how-to-make-a-diy-canvas-picture-frame-for-under-10/
LikeLike
Thank you so much for your hard work. I have been trying to figure this out for awhile. Wanting to paint this for a back splash.
LikeLiked by 1 person
That’s great! I’m sure it would be gorgeous, hopefully my instructions are clear enough. It was definitely a tricky pattern to figure out at first.
LikeLike